There's a particular sinking feeling that comes with realizing you've lost data that can never be recovered. I know because I've been there. Years ago, before I learned my lesson, I installed an iOS beta without backing up properly. The beta had a bug that corrupted some of my photo library. When I tried to restore, I discovered my only backup was also corrupted. Three years of photos, gone.
That experience changed how I approach backups forever. Now I'm almost obsessive about it—and I want to help you avoid making the same mistake I did. This guide is everything I wish someone had told me before that fateful day.
Beta software is inherently unstable. Apple releases it specifically to find bugs, which means you're signing up to encounter bugs. Most of the time, these bugs are minor annoyances. But occasionally, they can affect your data. And unlike stable iOS releases, you can't simply restore a beta backup to an older iOS version if things go wrong.
Why Backup Before iOS Beta is Non-Negotiable
Let me be direct: if you don't backup before installing iOS beta, you're gambling with your data. Here's exactly why:
The Backup Compatibility Problem
iOS backups are forward-compatible only. A backup made on iOS 26 can be restored to iOS 27. But a backup made on iOS 27 beta cannot be restored to iOS 26. This is a fundamental limitation of how Apple's backup system works, and there's no workaround.
Here's what this means in practice:
- You install iOS 27 beta without backing up
- A bug causes problems, or you just don't like the beta
- You decide to downgrade back to stable iOS 26
- To downgrade, you must erase your iPhone completely
- You try to restore from backup—but wait, your only backup was made on iOS 27 beta
- That backup won't work on iOS 26
- Result: You start with a fresh iPhone, losing all data from the beta period
If you had made a backup before installing beta, you could restore that pre-beta backup and only lose data from the beta period—not everything.
What's Actually at Risk
Take a moment to think about what's on your iPhone right now:
- Photos and Videos: Every moment captured over months or years
- Messages: Conversations with family, friends, loved ones
- Notes: Ideas, lists, important information
- Health Data: Years of fitness tracking, medical records
- App Data: Game progress, app settings, document
- Passwords: Saved logins, Wi-Fi passwords
- Contacts: Phone numbers, email addresses
Some of this data exists in iCloud and would survive a reset. But app data, local photos not synced to iCloud Photos, and many other things could be lost permanently.
Real Talk
Every beta season, I see people in forums asking how to recover data after a failed beta installation. The answer is almost always: you can't. The 30 minutes it takes to create a proper backup could save you from devastating data loss.
Backup Methods Compared: iCloud vs Computer
Apple gives you two primary ways to backup your iPhone: iCloud and computer (via Finder on Mac or iTunes on Windows). Each has strengths and weaknesses, and for beta testing, I recommend using both.
iCloud Backup
Wireless backup to Apple's servers
Backs up automatically when your iPhone is locked, charging, and connected to Wi-Fi. Convenient for daily backups but can't be archived.
Pros
- Automatic, no action needed
- Accessible from anywhere
- No computer required
- Encrypted by default
Considerations
- Requires iCloud storage
- Can't be archived
- Slower to restore
- Needs Wi-Fi connection
Computer Backup
Local backup via Finder or iTunes
Creates a complete backup on your Mac or PC. Can be encrypted to include all data, and most importantly, can be archived to prevent overwriting.
Pros
- Can be archived (critical!)
- Faster restore via USB
- No cloud storage needed
- Full local control
Considerations
- Requires computer
- Manual process
- Uses local storage
- Must enable encryption
My Recommendation
Use both methods. Create an iCloud backup for convenience and automatic updates, then create an encrypted, archived computer backup as your safety net. The computer backup is your "break glass in emergency" backup that won't be overwritten no matter what happens.
How to Create an iCloud Backup
iCloud backup is the most convenient method—your iPhone can backup automatically every day without you lifting a finger. But before installing beta, you want to force a fresh backup to ensure you have the most recent data saved.
Check Your iCloud Storage
Before creating a backup, make sure you have enough iCloud storage. If your iPhone uses 50GB, you'll need at least that much free in iCloud.
What to Look For
- Check "Available" storage—you need enough for your backup
- If low on space, upgrade your plan or delete old backups
- iCloud+ plans: 50GB ($0.99/mo), 200GB ($2.99/mo), 2TB ($9.99/mo)
- Tip: You can temporarily upgrade, create backup, then downgrade
Connect to Wi-Fi
iCloud backups require a Wi-Fi connection—they won't work over cellular data, even with unlimited plans. Connect to a stable Wi-Fi network, preferably one you trust and that has good upload speeds.
Wi-Fi Tips
- Use your home Wi-Fi for best speeds
- Avoid public Wi-Fi for security reasons
- Stay connected throughout the backup process
- If backup fails, try moving closer to your router
Start the Backup
Now let's create the actual backup. This process can take anywhere from a few minutes to over an hour depending on how much data you have and your internet speed.
Steps
- Make sure "Back Up This iPhone" is turned ON
- Tap "Back Up Now"
- You'll see "Estimating time remaining..." then a progress bar
- Keep your iPhone connected to Wi-Fi until complete
- When finished, check "Last successful backup" shows current date/time
Don't Close Settings
While the backup is in progress, try to keep the Settings app open and avoid putting your iPhone to sleep. The backup will continue in the background, but keeping the app open ensures you can monitor progress and catch any errors immediately.
How to Create a Computer Backup
A computer backup is your most reliable safety net. Unlike iCloud backups, computer backups can be archived—locked in place so they're never overwritten by future backups. This is crucial for beta testing.
On Mac (macOS Catalina or later)
Connect Your iPhone
Use a Lightning or USB-C cable to connect your iPhone to your Mac. If this is the first time connecting, you'll need to "Trust" the computer on your iPhone.
Connection Tips
- Use the cable that came with your iPhone for best reliability
- If using USB-C to Lightning, connect directly to Mac (not through a hub)
- Unlock your iPhone when prompted to "Trust This Computer"
- Enter your iPhone passcode to confirm trust
Open Finder and Select Your iPhone
Since macOS Catalina (2019), iTunes has been replaced by Finder for iPhone management. Your iPhone will appear in the Finder sidebar like an external drive.
Finding Your iPhone
- Open a new Finder window (Command + N)
- Look in the left sidebar under "Locations"
- Click your iPhone's name
- If you don't see it, scroll down in the sidebar or check cable connection
- If prompted to update, click "Not Now"—we want to backup first
Enable Encrypted Backup
This step is crucial. Encrypted backups include your saved passwords, Health data, and other sensitive information that unencrypted backups skip. Without encryption, you'll lose this data when restoring.
How to Enable Encryption
- In Finder with your iPhone selected, look at the General tab
- Under "Backups," check "Encrypt local backup"
- You'll be prompted to create a password—DO NOT FORGET THIS PASSWORD
- Without this password, you cannot restore from the backup
- Write the password down and store it somewhere safe
Password Warning
If you forget your encrypted backup password, there is NO way to recover it. Apple cannot help you. The backup becomes completely unusable. Use a password manager or write it down in a secure location.
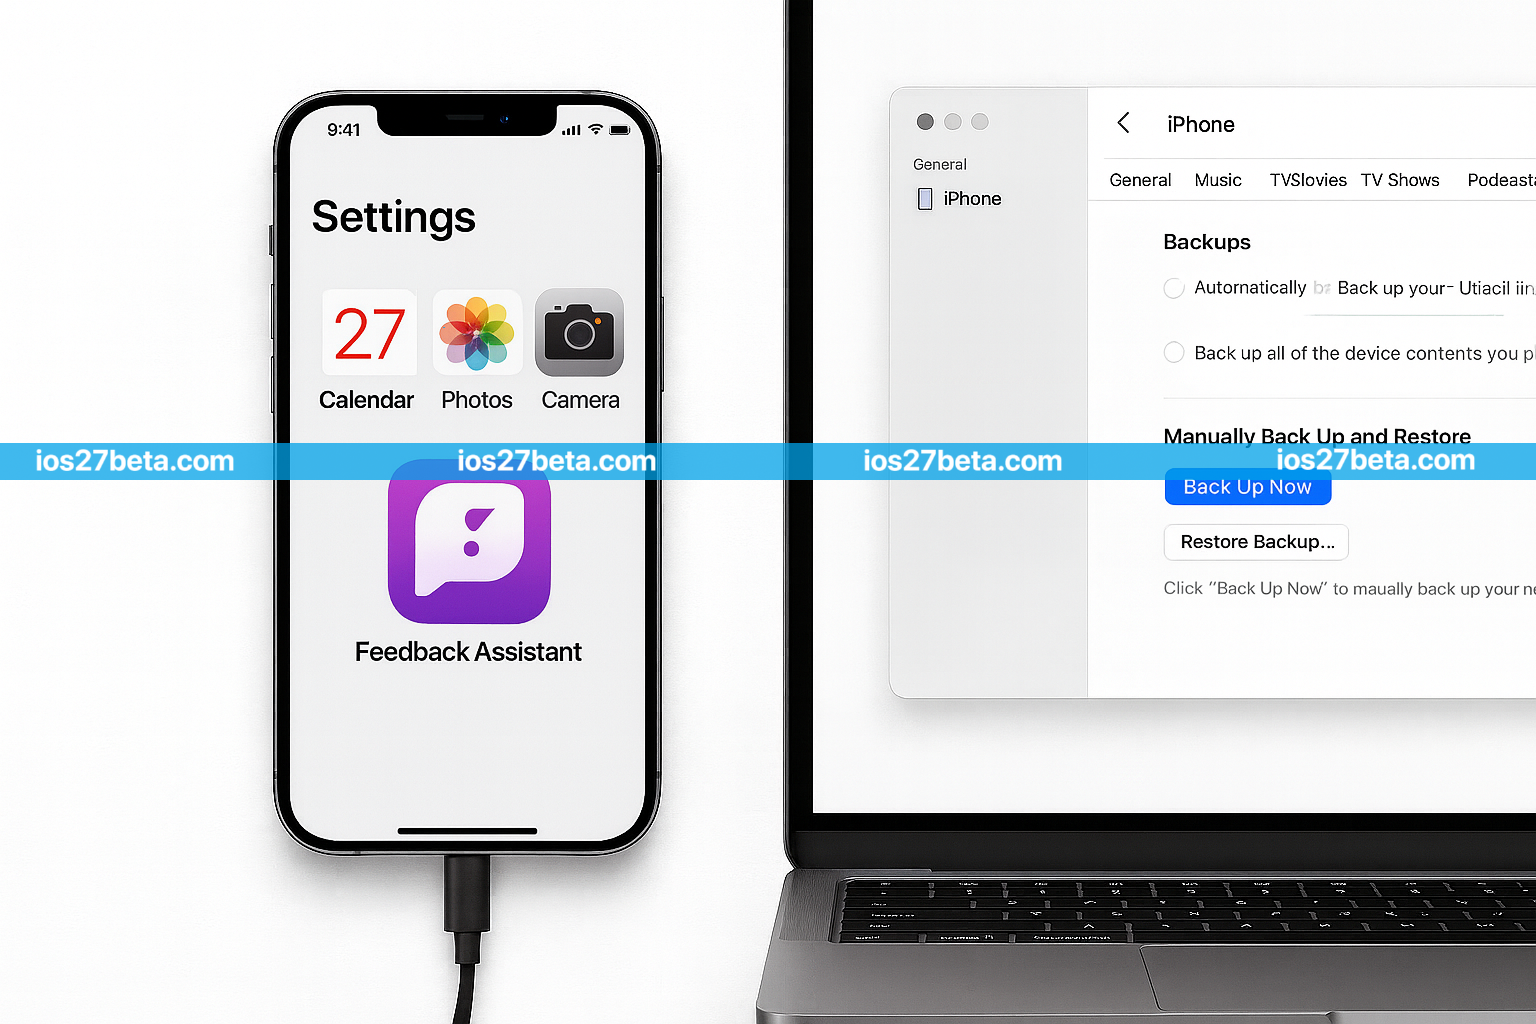
Start the Backup
With encryption enabled, you're ready to create the backup. This will create a complete snapshot of your iPhone that can be restored at any time.
Starting the Backup
- Click "Back Up Now"
- A progress bar will appear at the top of Finder
- Keep your iPhone connected throughout
- Don't put your Mac to sleep during backup
- When complete, check the timestamp under "Latest Backup"
On Windows PC (using iTunes)
If you're using a Windows PC, the process uses iTunes instead of Finder. The steps are similar:
Windows Steps
- Download and install iTunes from the Microsoft Store or Apple website
- Connect your iPhone with a USB cable
- Click the iPhone icon in the top-left of iTunes
- Under "Backups," select "This computer"
- Check "Encrypt local backup" and set a password
- Click "Back Up Now"
- Wait for completion and verify the backup timestamp
Archiving Your Backup (Most Important Step)
Here's where most people go wrong. Creating a backup is good, but if you don't archive it, it will be overwritten the next time you backup. And guess what happens when you backup after installing iOS beta? Your pre-beta backup gets replaced with a beta backup—which can't be restored to stable iOS.
Archiving locks your backup in place. It will never be overwritten, no matter how many future backups you create.
Open Backup Management
On Mac (Finder)
- With your iPhone selected in Finder, go to the General tab
- Click "Manage Backups..."
- A window will appear showing all your iPhone/iPad backups
On Windows (iTunes)
- In iTunes, go to Edit → Preferences (or iTunes → Preferences on older versions)
- Click the Devices tab
- You'll see a list of all device backups
Archive the Backup
This is the step that will save you if something goes wrong with iOS beta.
Archiving Steps
- Find the backup you just created (should show today's date/time)
- Right-click (or Control-click on Mac) on the backup
- Select "Archive"
- The backup will now show a date/time after its name
- This archived backup will never be overwritten
How to Identify Archived Backups
Archived backups display their date/time after the device name, like "John's iPhone - January 3, 2026 10:30 AM". Regular backups just show the device name. If you see the date, it's archived and safe.
Why Encrypted Backups Matter
I mentioned encryption earlier, but it's important enough to deserve its own section. Here's exactly what you get with encrypted backups versus unencrypted ones:
Data Included in Backups
As you can see, encrypted backups include significantly more data. If you restore from an unencrypted backup, you'll need to re-enter every password, reconfigure Wi-Fi networks, and lose all your Health data history. That could be years of fitness tracking, sleep data, and medical records—gone.
Verifying Your Backup
A backup you can't restore from is worthless. Before installing iOS beta, take a few minutes to verify your backups actually exist and contain what you expect.
Verify iCloud Backup
Check the "Last successful backup" timestamp. It should show today's date and a recent time. If it shows an old date, your recent backup didn't complete—go back and try again.
Verify Computer Backup
In Finder (Mac) or iTunes (Windows), click "Manage Backups" and verify:
- Your backup appears in the list
- The date and time are correct (should be recent)
- A lock icon appears next to it (indicating encryption)
- If archived, the date appears after the device name
Check Backup Size
In Finder, right-click your backup and select "Show in Finder" to see the actual backup folder. Check its size—it should roughly match your iPhone's used storage. A suspiciously small backup (like 1GB when your iPhone has 50GB used) might indicate an incomplete backup.
How to Restore from Backup
Knowing how to restore is just as important as knowing how to backup. If something goes wrong with iOS beta, you'll need to restore your pre-beta backup. Here's how.
Restore from iCloud Backup
iCloud Restore Steps
- If your iPhone is functional, go to
Settings → General → Transfer or Reset iPhone → Erase All Content and Settings - Your iPhone will restart and show the setup screen
- Go through initial setup until you reach "Apps & Data"
- Select "Restore from iCloud Backup"
- Sign in with your Apple ID
- Choose your backup (select the pre-beta one if multiple exist)
- Wait for restore to complete—can take 1-3 hours
Restore from Computer Backup
Computer Restore Steps
- Connect your iPhone to your Mac/PC
- If your iPhone is on the setup screen, skip to step 5
- If iPhone is functional: open Finder/iTunes and select your iPhone
- Click "Restore iPhone..." to erase and reinstall iOS
- After iOS installs, you'll see the setup screen
- On the "Apps & Data" screen, select "Restore from Mac or PC"
- In Finder/iTunes, click "Restore Backup..."
- Select your archived pre-beta backup
- Enter your encryption password if prompted
- Wait for restore to complete
Downgrading from iOS Beta
If iOS beta is giving you trouble and you want to go back to stable iOS, here's the complete process. Remember: you can only restore from a backup made before you installed beta.
Put iPhone in Recovery Mode
Recovery Mode allows you to install a different iOS version. The button combination varies by iPhone model:
iPhone 8 and later (including all Face ID models)
- Connect iPhone to your computer
- Quickly press and release Volume Up
- Quickly press and release Volume Down
- Press and hold the Side Button
- Keep holding until you see the Recovery Mode screen (computer and cable icon)
Restore iOS
Your computer will detect the iPhone in Recovery Mode and offer options.
Restore Steps
- Finder (Mac) or iTunes (Windows) will show a popup
- Click "Restore" (not "Update")
- Confirm you want to restore
- Your computer will download the latest stable iOS
- iOS will be installed on your iPhone
- This erases everything on your iPhone
Restore Your Backup
After iOS installs, your iPhone will restart to the setup screen. Now restore from your archived pre-beta backup:
Restore Steps
- Complete initial setup screens
- On "Apps & Data," choose "Restore from Mac or PC"
- In Finder/iTunes, select "Restore Backup..."
- Choose your archived pre-beta backup
- Enter encryption password
- Wait for restore to complete
- Your iPhone will restart with all your pre-beta data
Data Loss Warning
Any data created while running iOS beta will be lost during this process. Photos taken, messages sent, app progress made—all gone. This is why the pre-beta backup is so important.
Troubleshooting Common Issues
iCloud Backup Keeps Failing
Solutions
- Check iCloud storage—you may need to upgrade or free space
- Ensure stable Wi-Fi connection throughout backup
- Sign out of iCloud and sign back in (Settings → [Your Name] → Sign Out)
- Restart your iPhone and try again
- Reset network settings (Settings → General → Transfer or Reset → Reset Network Settings)
- Try backing up at a different time (Apple servers may be busy)
Computer Doesn't Recognize iPhone
Solutions
- Try a different USB cable (preferably Apple original)
- Try a different USB port on your computer
- Unlock your iPhone and tap "Trust" when prompted
- Restart both your iPhone and computer
- On Mac: Open Finder → Preferences → Sidebar → check "CDs, DVDs, and iOS Devices"
- On Windows: Update iTunes and Apple Mobile Device drivers
Forgot Encrypted Backup Password
Unfortunately, Options Are Limited
- There is no way to recover a forgotten encrypted backup password
- Apple cannot help—the encryption is by design
- Try common passwords you might have used
- Check password managers or notes where you might have saved it
- You can create a NEW unencrypted backup (but it won't have passwords/Health data)
- In iOS 11+, you can reset the password: Settings → General → Transfer or Reset → Reset All Settings (doesn't erase data, but resets the backup password)
Not Enough Storage for Backup
Solutions
- iCloud: Upgrade to a larger plan (even temporarily)
- iCloud: Delete old backups from other devices
- Computer: Free up space on your Mac/PC
- Computer: Delete old backups you no longer need
- Computer: Move backups to an external drive (advanced)
- Review what's using space on your iPhone and delete unnecessary data first
Pre-Beta Installation Checklist
Before you install iOS 27 beta, make sure you can check off every item on this list. Print it out or keep this page open while you prepare.
Complete Before Installing iOS Beta
- iCloud Backup created – Settings → [Your Name] → iCloud → iCloud Backup shows today's date
- Computer backup created – Finder/iTunes backup completed successfully
- Encryption enabled – Computer backup includes passwords and Health data
- Encryption password saved – Written down in a safe place you won't forget
- Backup archived – Right-click → Archive in Manage Backups
- Backup verified – Date/time and size look correct
- iCloud Photos enabled – Photos backed up to cloud (optional but recommended)
- Important data synced – Contacts, calendars, notes synced to iCloud
- Know how to restore – Reviewed restore process in this guide
- Understand the risks – Beta backups can't restore to stable iOS
Frequently Asked Questions
Backup Complete?
Now you're ready to safely install iOS beta with peace of mind.